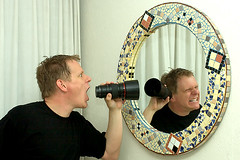
 Self portraits are among the most difficult and most rewarding types of photography. It provides you with an extremely patient model, capable of understanding all your problems and prepared to try all kinds of lighting setups and crazy ideas. He or she may not be particularly pretty or very experienced in posing, but will make up for it with flexibility, perseverance and dedication. And all of that for free, your model won’t even ask for prints. It does however require some skills and a lot of practice to get decent results from self portraits.
 The basics are the same as in the case of standard portraiture. Lighting, composition and expressions work out similar as in the case of photographing someone else. Likewise, self portraits require the same post processing steps as normal portraits, provided they are the same type of portraits.
Use a tripod
Here’s a pretty obvious tip: use a tripod. Yes, you can hold your camera at arm’s length and in some cases, this will yield a great self portrait. In most cases, it will only limit your possibilities. If you don’t have a tripod, put it on top of your wish list. It will open up a new world for you. In the meantime use something that’s sturdy and horizontal and has the required height.
Use a dummy
Once you’ve put your camera on the tripod, put a dummy in the place where you will be when shooting the portrait. Autofocus on the dummy, the set your camera or lens to manual focus and don’t move the camera. When ready, replace the dummy by yourself. Use a timer or a remote to trigger the shutter.
Make it a little easier on yourself
Getting decent self portraits is hard enough as it is, so why not make it a little easier on yourself. First of all, frame the picture a little wider than you normally would. This gives you room to crop the picture afterwards if you weren’t in the exact position you should be. Likewise, do not use very wide apertures. If you do, your depth of field becomes small, and your exact position will become a very critical factor. Using a smaller aperture (higher f) will literally give you some breathing space.
No comments:
Post a Comment